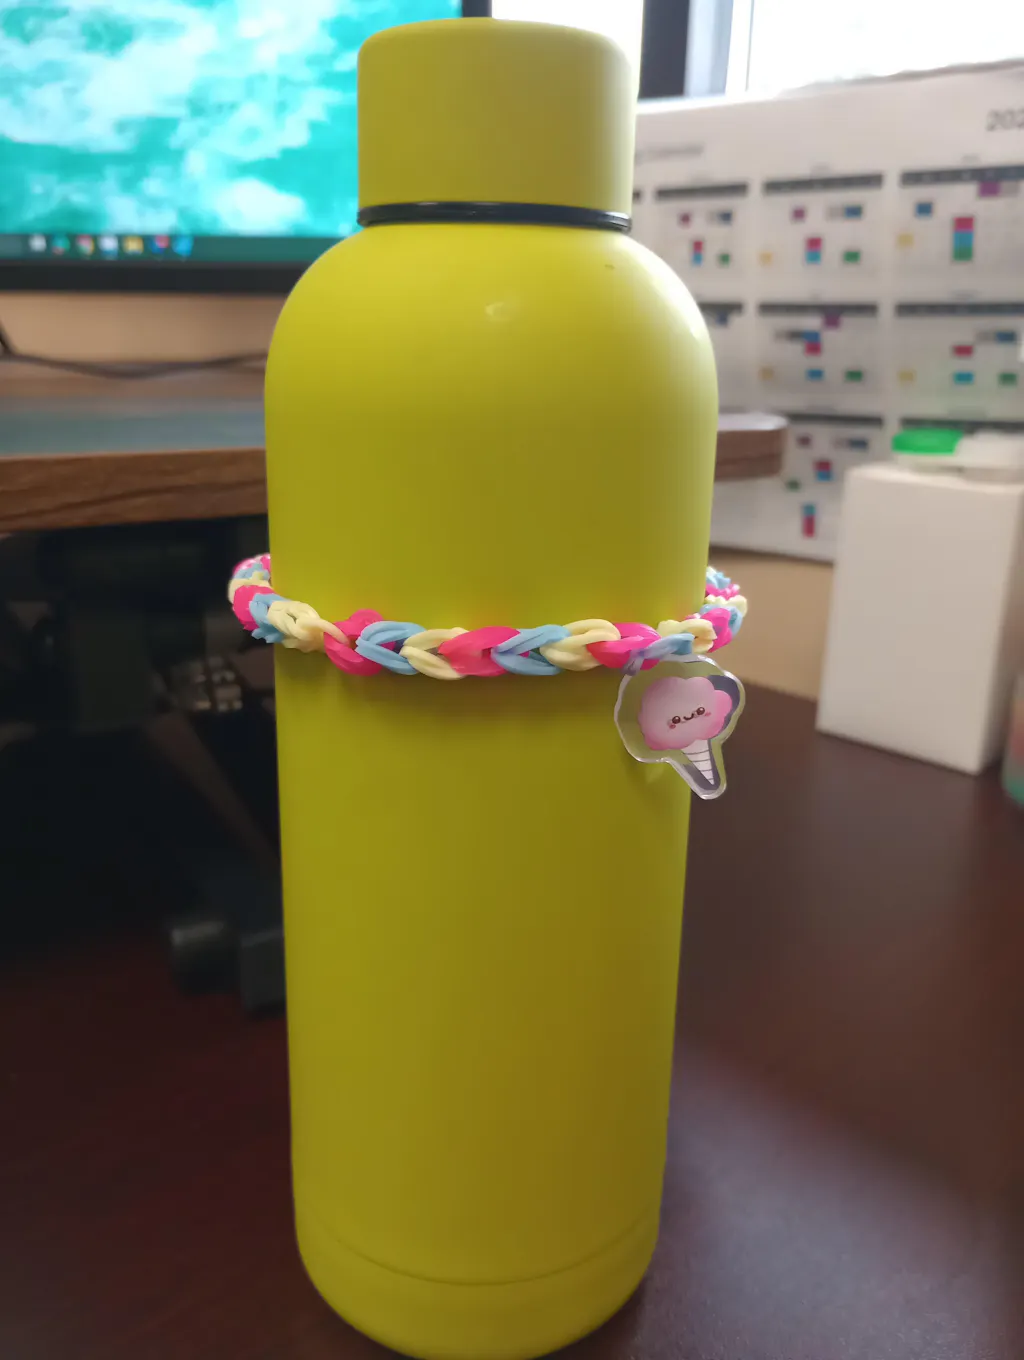
DTF Transfer

 
Sort by:
Chest + Nuts Christmas – DTF Transfer for Shirts

Chest + Nuts Christmas – DTF Transfer Set for Shirts

From $1.99
YOU WILL RECEIVE TONS OF COMPLIMENTS: Prepare for a flood of compliments! Each design is a fantastic conversation starter, and everyone will be curious about where you got it. Print Size:  Pressing Instructions:  Pre-Press: Removing moisture is unnecessary but recommended. Only do a prepress if you so desire. Position Your Design: Take your time to line up your transfer in the desired location on your item. Normally, there is no need to use heat-resistant tape on flat heat presses to keep your design in place, however it is highly recommended when pressing transfers onto hats or when using an iron to keep the transfer in place. You’ll get a feel for when this is needed. Press 1: Place a Parchment paper on top of the design & Press your transfer with Med to Heavy pressure at 310°F / 155°C for 30-35seconds. You cannot damage the transfer by pressing with more heat, pressure, or time — within reason. However, too much heat can damage your garment, so test first and use parchment paper or a protective guard sheet to protect your garment from a direct iron. Press 2: Let  Sit for 10 Seconds and Repeat press Let It Cool. Then Peel It: After pressing, let your transfer rest until it is cool to the touch (minimum of 15-30 seconds). Once cool, lift the transfer from one corner and gently peel back. Don’t use your hands, use your EYES. This ensures every piece of your design is adhering to your item. If not, stop peeling, lay it back down, and trouble shoot as follows — (1.) If some or all of the design does not transfer AND it was cool when peeling, it means there was not enough heat, pressure, or time. Press your transfer again with more pressure and time first (+5-10 seconds). (2.) If that doesn’t work, try 15°F heat increments until you find the sweet spot. You truly cannot damage the transfer by pressing multiple times. Final Press & Wash Instructions: Place a parchment paper or a single layer of t-shirt material over the design and press again for 15 seconds to soften the design, increase durability, and remove shine. If you want a shiny finish, cover with a protective guard sheet for the final press. When washing, flip shirt inside out, wash on cold and dry using low heat or hang. *By purchasing you agree that the process for the application of our transfers is your responsibility and we not refund due to user error. There is a learning curve to heat pressing and transfers and every heat press is different.**A heat press is recommended though this will work with a circut or an iron as well***All Sales are Final
Official Cookie Tester Youth – DTF Transfer

Official Cookie Tester – DTF Transfer

From $0.80
YOU WILL RECEIVE TONS OF COMPLIMENTS: Prepare for a flood of compliments! Each design is a fantastic conversation starter, and everyone will be curious about where you got it. Print Size: Pressing Instructions:  Pre-Press: Removing moisture is unnecessary but recommended. Only do a prepress if you so desire. Position Your Design: Take your time to line up your transfer in the desired location on your item. Normally, there is no need to use heat-resistant tape on flat heat presses to keep your design in place, however it is highly recommended when pressing transfers onto hats or when using an iron to keep the transfer in place. You’ll get a feel for when this is needed. Press 1: Place a Parchment paper on top of the design & Press your transfer with Med to Heavy pressure at 310°F / 155°C for 30-35seconds. You cannot damage the transfer by pressing with more heat, pressure, or time — within reason. However, too much heat can damage your garment, so test first and use parchment paper or a protective guard sheet to protect your garment from a direct iron. Press 2: Let  Sit for 10 Seconds and Repeat press Let It Cool. Then Peel It: After pressing, let your transfer rest until it is cool to the touch (minimum of 15-30 seconds). Once cool, lift the transfer from one corner and gently peel back. Don’t use your hands, use your EYES. This ensures every piece of your design is adhering to your item. If not, stop peeling, lay it back down, and trouble shoot as follows — (1.) If some or all of the design does not transfer AND it was cool when peeling, it means there was not enough heat, pressure, or time. Press your transfer again with more pressure and time first (+5-10 seconds). (2.) If that doesn’t work, try 15°F heat increments until you find the sweet spot. You truly cannot damage the transfer by pressing multiple times. Final Press & Wash Instructions: Place a parchment paper or a single layer of t-shirt material over the design and press again for 15 seconds to soften the design, increase durability, and remove shine. If you want a shiny finish, cover with a protective guard sheet for the final press. When washing, flip shirt inside out, wash on cold and dry using low heat or hang. *By purchasing you agree that the process for the application of our transfers is your responsibility and we not refund due to user error. There is a learning curve to heat pressing and transfers and every heat press is different.**A heat press is recommended though this will work with a circut or an iron as well***All Sales are Final
Meowy Christmas cat lovers DTF Transfer

Meowy Christmas cat lovers DTF Transfer

From $0.80
YOU WILL RECEIVE TONS OF COMPLIMENTS: Prepare for a flood of compliments! Each design is a fantastic conversation starter, and everyone will be curious about where you got it. Print Size:  Pressing Instructions:  Pre-Press: Removing moisture is unnecessary but recommended. Only do a prepress if you so desire. Position Your Design: Take your time to line up your transfer in the desired location on your item. Normally, there is no need to use heat-resistant tape on flat heat presses to keep your design in place, however it is highly recommended when pressing transfers onto hats or when using an iron to keep the transfer in place. You’ll get a feel for when this is needed. Press 1: Place a Parchment paper on top of the design & Press your transfer with Med to Heavy pressure at 310°F / 155°C for 30-35seconds. You cannot damage the transfer by pressing with more heat, pressure, or time — within reason. However, too much heat can damage your garment, so test first and use parchment paper or a protective guard sheet to protect your garment from a direct iron. Press 2: Let  Sit for 10 Seconds and Repeat press Let It Cool. Then Peel It: After pressing, let your transfer rest until it is cool to the touch (minimum of 15-30 seconds). Once cool, lift the transfer from one corner and gently peel back. Don’t use your hands, use your EYES. This ensures every piece of your design is adhering to your item. If not, stop peeling, lay it back down, and trouble shoot as follows — (1.) If some or all of the design does not transfer AND it was cool when peeling, it means there was not enough heat, pressure, or time. Press your transfer again with more pressure and time first (+5-10 seconds). (2.) If that doesn’t work, try 15°F heat increments until you find the sweet spot. You truly cannot damage the transfer by pressing multiple times. Final Press & Wash Instructions: Place a parchment paper or a single layer of t-shirt material over the design and press again for 15 seconds to soften the design, increase durability, and remove shine. If you want a shiny finish, cover with a protective guard sheet for the final press. When washing, flip shirt inside out, wash on cold and dry using low heat or hang. *By purchasing you agree that the process for the application of our transfers is your responsibility and we not refund due to user error. There is a learning curve to heat pressing and transfers and every heat press is different.**A heat press is recommended though this will work with a circut or an iron as well***All Sales are Final
Christmas Santa’s Drinking Team – DTF Transfer

Christmas Santa’s Drinking Team – DTF Transfer

From $0.80
YOU WILL RECEIVE TONS OF COMPLIMENTS: Prepare for a flood of compliments! Each design is a fantastic conversation starter, and everyone will be curious about where you got it. Print Size: Pressing Instructions:  Pre-Press: Removing moisture is unnecessary but recommended. Only do a prepress if you so desire. Position Your Design: Take your time to line up your transfer in the desired location on your item. Normally, there is no need to use heat-resistant tape on flat heat presses to keep your design in place, however it is highly recommended when pressing transfers onto hats or when using an iron to keep the transfer in place. You’ll get a feel for when this is needed. Press 1: Place a Parchment paper on top of the design & Press your transfer with Med to Heavy pressure at 310°F / 155°C for 30-35seconds. You cannot damage the transfer by pressing with more heat, pressure, or time — within reason. However, too much heat can damage your garment, so test first and use parchment paper or a protective guard sheet to protect your garment from a direct iron. Press 2: Let  Sit for 10 Seconds and Repeat press Let It Cool. Then Peel It: After pressing, let your transfer rest until it is cool to the touch (minimum of 15-30 seconds). Once cool, lift the transfer from one corner and gently peel back. Don’t use your hands, use your EYES. This ensures every piece of your design is adhering to your item. If not, stop peeling, lay it back down, and trouble shoot as follows — (1.) If some or all of the design does not transfer AND it was cool when peeling, it means there was not enough heat, pressure, or time. Press your transfer again with more pressure and time first (+5-10 seconds). (2.) If that doesn’t work, try 15°F heat increments until you find the sweet spot. You truly cannot damage the transfer by pressing multiple times. Final Press & Wash Instructions: Place a parchment paper or a single layer of t-shirt material over the design and press again for 15 seconds to soften the design, increase durability, and remove shine. If you want a shiny finish, cover with a protective guard sheet for the final press. When washing, flip shirt inside out, wash on cold and dry using low heat or hang. *By purchasing you agree that the process for the application of our transfers is your responsibility and we not refund due to user error. There is a learning curve to heat pressing and transfers and every heat press is different.**A heat press is recommended though this will work with a circut or an iron as well***All Sales are Final
Christmas Crew – DTF Transfer

Christmas Crew – DTF Transfer

From $0.80
YOU WILL RECEIVE TONS OF COMPLIMENTS: Prepare for a flood of compliments! Each design is a fantastic conversation starter, and everyone will be curious about where you got it. Print Size: Pressing Instructions:  Pre-Press: Removing moisture is unnecessary but recommended. Only do a prepress if you so desire. Position Your Design: Take your time to line up your transfer in the desired location on your item. Normally, there is no need to use heat-resistant tape on flat heat presses to keep your design in place, however it is highly recommended when pressing transfers onto hats or when using an iron to keep the transfer in place. You’ll get a feel for when this is needed. Press 1: Place a Parchment paper on top of the design & Press your transfer with Med to Heavy pressure at 310°F / 155°C for 30-35seconds. You cannot damage the transfer by pressing with more heat, pressure, or time — within reason. However, too much heat can damage your garment, so test first and use parchment paper or a protective guard sheet to protect your garment from a direct iron. Press 2: Let  Sit for 10 Seconds and Repeat press Let It Cool. Then Peel It: After pressing, let your transfer rest until it is cool to the touch (minimum of 15-30 seconds). Once cool, lift the transfer from one corner and gently peel back. Don’t use your hands, use your EYES. This ensures every piece of your design is adhering to your item. If not, stop peeling, lay it back down, and trouble shoot as follows — (1.) If some or all of the design does not transfer AND it was cool when peeling, it means there was not enough heat, pressure, or time. Press your transfer again with more pressure and time first (+5-10 seconds). (2.) If that doesn’t work, try 15°F heat increments until you find the sweet spot. You truly cannot damage the transfer by pressing multiple times. Final Press & Wash Instructions: Place a parchment paper or a single layer of t-shirt material over the design and press again for 15 seconds to soften the design, increase durability, and remove shine. If you want a shiny finish, cover with a protective guard sheet for the final press. When washing, flip shirt inside out, wash on cold and dry using low heat or hang. *By purchasing you agree that the process for the application of our transfers is your responsibility and we not refund due to user error. There is a learning curve to heat pressing and transfers and every heat press is different.**A heat press is recommended though this will work with a circut or an iron as well***All Sales are Final
Christmas Baking Squad Adult – DTF Transfer

Christmas Baking Squad – DTF Transfer

From $0.80
YOU WILL RECEIVE TONS OF COMPLIMENTS: Prepare for a flood of compliments! Each design is a fantastic conversation starter, and everyone will be curious about where you got it. Print Size:  Pressing Instructions:  Pre-Press: Removing moisture is unnecessary but recommended. Only do a prepress if you so desire. Position Your Design: Take your time to line up your transfer in the desired location on your item. Normally, there is no need to use heat-resistant tape on flat heat presses to keep your design in place, however it is highly recommended when pressing transfers onto hats or when using an iron to keep the transfer in place. You’ll get a feel for when this is needed. Press 1: Place a Parchment paper on top of the design & Press your transfer with Med to Heavy pressure at 310°F / 155°C for 30-35seconds. You cannot damage the transfer by pressing with more heat, pressure, or time — within reason. However, too much heat can damage your garment, so test first and use parchment paper or a protective guard sheet to protect your garment from a direct iron. Press 2: Let  Sit for 10 Seconds and Repeat press Let It Cool. Then Peel It: After pressing, let your transfer rest until it is cool to the touch (minimum of 15-30 seconds). Once cool, lift the transfer from one corner and gently peel back. Don’t use your hands, use your EYES. This ensures every piece of your design is adhering to your item. If not, stop peeling, lay it back down, and trouble shoot as follows — (1.) If some or all of the design does not transfer AND it was cool when peeling, it means there was not enough heat, pressure, or time. Press your transfer again with more pressure and time first (+5-10 seconds). (2.) If that doesn’t work, try 15°F heat increments until you find the sweet spot. You truly cannot damage the transfer by pressing multiple times. Final Press & Wash Instructions: Place a parchment paper or a single layer of t-shirt material over the design and press again for 15 seconds to soften the design, increase durability, and remove shine. If you want a shiny finish, cover with a protective guard sheet for the final press. When washing, flip shirt inside out, wash on cold and dry using low heat or hang. *By purchasing you agree that the process for the application of our transfers is your responsibility and we not refund due to user error. There is a learning curve to heat pressing and transfers and every heat press is different.**A heat press is recommended though this will work with a circut or an iron as well***All Sales are Final
Bad Bitch Vibes – DTF Transfer

100% That Grinch Christmas - DTF Transfer

From $0.80
YOU WILL RECEIVE TONS OF COMPLIMENTS: Prepare for a flood of compliments! Each design is a fantastic conversation starter, and everyone will be curious about where you got it. Print Size:  Pressing Instructions:  Pre-Press: Removing moisture is unnecessary but recommended. Only do a prepress if you so desire. Position Your Design: Take your time to line up your transfer in the desired location on your item. Normally, there is no need to use heat-resistant tape on flat heat presses to keep your design in place, however it is highly recommended when pressing transfers onto hats or when using an iron to keep the transfer in place. You’ll get a feel for when this is needed. Press 1: Place a Parchment paper on top of the design & Press your transfer with Med to Heavy pressure at 310°F / 155°C for 30-35seconds. You cannot damage the transfer by pressing with more heat, pressure, or time — within reason. However, too much heat can damage your garment, so test first and use parchment paper or a protective guard sheet to protect your garment from a direct iron. Press 2: Let  Sit for 10 Seconds and Repeat press Let It Cool. Then Peel It: After pressing, let your transfer rest until it is cool to the touch (minimum of 15-30 seconds). Once cool, lift the transfer from one corner and gently peel back. Don’t use your hands, use your EYES. This ensures every piece of your design is adhering to your item. If not, stop peeling, lay it back down, and trouble shoot as follows — (1.) If some or all of the design does not transfer AND it was cool when peeling, it means there was not enough heat, pressure, or time. Press your transfer again with more pressure and time first (+5-10 seconds). (2.) If that doesn’t work, try 15°F heat increments until you find the sweet spot. You truly cannot damage the transfer by pressing multiple times. Final Press & Wash Instructions: Place a parchment paper or a single layer of t-shirt material over the design and press again for 15 seconds to soften the design, increase durability, and remove shine. If you want a shiny finish, cover with a protective guard sheet for the final press. When washing, flip shirt inside out, wash on cold and dry using low heat or hang. *By purchasing you agree that the process for the application of our transfers is your responsibility and we not refund due to user error. There is a learning curve to heat pressing and transfers and every heat press is different.**A heat press is recommended though this will work with a circut or an iron as well***All Sales are Final
Ho-Ho Whole Bottle Christmas DTF Transfer

Ho-Ho Whole Bottle Christmas DTF Transfer

From $0.80
YOU WILL RECEIVE TONS OF COMPLIMENTS: Prepare for a flood of compliments! Each design is a fantastic conversation starter, and everyone will be curious about where you got it. Print Size:  Pressing Instructions:  Pre-Press: Removing moisture is unnecessary but recommended. Only do a prepress if you so desire. Position Your Design: Take your time to line up your transfer in the desired location on your item. Normally, there is no need to use heat-resistant tape on flat heat presses to keep your design in place, however it is highly recommended when pressing transfers onto hats or when using an iron to keep the transfer in place. You’ll get a feel for when this is needed. Press 1: Place a Parchment paper on top of the design & Press your transfer with Med to Heavy pressure at 310°F / 155°C for 30-35seconds. You cannot damage the transfer by pressing with more heat, pressure, or time — within reason. However, too much heat can damage your garment, so test first and use parchment paper or a protective guard sheet to protect your garment from a direct iron. Press 2: Let  Sit for 10 Seconds and Repeat press Let It Cool. Then Peel It: After pressing, let your transfer rest until it is cool to the touch (minimum of 15-30 seconds). Once cool, lift the transfer from one corner and gently peel back. Don’t use your hands, use your EYES. This ensures every piece of your design is adhering to your item. If not, stop peeling, lay it back down, and trouble shoot as follows — (1.) If some or all of the design does not transfer AND it was cool when peeling, it means there was not enough heat, pressure, or time. Press your transfer again with more pressure and time first (+5-10 seconds). (2.) If that doesn’t work, try 15°F heat increments until you find the sweet spot. You truly cannot damage the transfer by pressing multiple times. Final Press & Wash Instructions: Place a parchment paper or a single layer of t-shirt material over the design and press again for 15 seconds to soften the design, increase durability, and remove shine. If you want a shiny finish, cover with a protective guard sheet for the final press. When washing, flip shirt inside out, wash on cold and dry using low heat or hang. *By purchasing you agree that the process for the application of our transfers is your responsibility and we not refund due to user error. There is a learning curve to heat pressing and transfers and every heat press is different.**A heat press is recommended though this will work with a circut or an iron as well***All Sales are Final
Lay Under A Tree – DTF Transfer

Lay Under A Tree – DTF Transfer

From $0.80
YOU WILL RECEIVE TONS OF COMPLIMENTS: Prepare for a flood of compliments! Each design is a fantastic conversation starter, and everyone will be curious about where you got it. Print Size:  Pressing Instructions:  Pre-Press: Removing moisture is unnecessary but recommended. Only do a prepress if you so desire. Position Your Design: Take your time to line up your transfer in the desired location on your item. Normally, there is no need to use heat-resistant tape on flat heat presses to keep your design in place, however it is highly recommended when pressing transfers onto hats or when using an iron to keep the transfer in place. You’ll get a feel for when this is needed. Press 1: Place a Parchment paper on top of the design & Press your transfer with Med to Heavy pressure at 310°F / 155°C for 30-35seconds. You cannot damage the transfer by pressing with more heat, pressure, or time — within reason. However, too much heat can damage your garment, so test first and use parchment paper or a protective guard sheet to protect your garment from a direct iron. Press 2: Let  Sit for 10 Seconds and Repeat press Let It Cool. Then Peel It: After pressing, let your transfer rest until it is cool to the touch (minimum of 15-30 seconds). Once cool, lift the transfer from one corner and gently peel back. Don’t use your hands, use your EYES. This ensures every piece of your design is adhering to your item. If not, stop peeling, lay it back down, and trouble shoot as follows — (1.) If some or all of the design does not transfer AND it was cool when peeling, it means there was not enough heat, pressure, or time. Press your transfer again with more pressure and time first (+5-10 seconds). (2.) If that doesn’t work, try 15°F heat increments until you find the sweet spot. You truly cannot damage the transfer by pressing multiple times. Final Press & Wash Instructions: Place a parchment paper or a single layer of t-shirt material over the design and press again for 15 seconds to soften the design, increase durability, and remove shine. If you want a shiny finish, cover with a protective guard sheet for the final press. When washing, flip shirt inside out, wash on cold and dry using low heat or hang. *By purchasing you agree that the process for the application of our transfers is your responsibility and we not refund due to user error. There is a learning curve to heat pressing and transfers and every heat press is different.**A heat press is recommended though this will work with a circut or an iron as well***All Sales are Final
Ho’s In This House – DTF Transfer

Ho’s In This House – DTF Transfer

From $0.80
YOU WILL RECEIVE TONS OF COMPLIMENTS: Prepare for a flood of compliments! Each design is a fantastic conversation starter, and everyone will be curious about where you got it. Print Size:  Pressing Instructions:  Pre-Press: Removing moisture is unnecessary but recommended. Only do a prepress if you so desire. Position Your Design: Take your time to line up your transfer in the desired location on your item. Normally, there is no need to use heat-resistant tape on flat heat presses to keep your design in place, however it is highly recommended when pressing transfers onto hats or when using an iron to keep the transfer in place. You’ll get a feel for when this is needed. Press 1: Place a Parchment paper on top of the design & Press your transfer with Med to Heavy pressure at 310°F / 155°C for 30-35seconds. You cannot damage the transfer by pressing with more heat, pressure, or time — within reason. However, too much heat can damage your garment, so test first and use parchment paper or a protective guard sheet to protect your garment from a direct iron. Press 2: Let  Sit for 10 Seconds and Repeat press Let It Cool. Then Peel It: After pressing, let your transfer rest until it is cool to the touch (minimum of 15-30 seconds). Once cool, lift the transfer from one corner and gently peel back. Don’t use your hands, use your EYES. This ensures every piece of your design is adhering to your item. If not, stop peeling, lay it back down, and trouble shoot as follows — (1.) If some or all of the design does not transfer AND it was cool when peeling, it means there was not enough heat, pressure, or time. Press your transfer again with more pressure and time first (+5-10 seconds). (2.) If that doesn’t work, try 15°F heat increments until you find the sweet spot. You truly cannot damage the transfer by pressing multiple times. Final Press & Wash Instructions: Place a parchment paper or a single layer of t-shirt material over the design and press again for 15 seconds to soften the design, increase durability, and remove shine. If you want a shiny finish, cover with a protective guard sheet for the final press. When washing, flip shirt inside out, wash on cold and dry using low heat or hang. *By purchasing you agree that the process for the application of our transfers is your responsibility and we not refund due to user error. There is a learning curve to heat pressing and transfers and every heat press is different.**A heat press is recommended though this will work with a circut or an iron as well***All Sales are Final
Dino Christmas DTF Transfer

Dino Christmas DTF Transfer

From $0.80
YOU WILL RECEIVE TONS OF COMPLIMENTS: Prepare for a flood of compliments! Each design is a fantastic conversation starter, and everyone will be curious about where you got it. Print Size:  Pressing Instructions:  Pre-Press: Removing moisture is unnecessary but recommended. Only do a prepress if you so desire. Position Your Design: Take your time to line up your transfer in the desired location on your item. Normally, there is no need to use heat-resistant tape on flat heat presses to keep your design in place, however it is highly recommended when pressing transfers onto hats or when using an iron to keep the transfer in place. You’ll get a feel for when this is needed. Press 1: Place a Parchment paper on top of the design & Press your transfer with Med to Heavy pressure at 310°F / 155°C for 30-35seconds. You cannot damage the transfer by pressing with more heat, pressure, or time — within reason. However, too much heat can damage your garment, so test first and use parchment paper or a protective guard sheet to protect your garment from a direct iron. Press 2: Let  Sit for 10 Seconds and Repeat press Let It Cool. Then Peel It: After pressing, let your transfer rest until it is cool to the touch (minimum of 15-30 seconds). Once cool, lift the transfer from one corner and gently peel back. Don’t use your hands, use your EYES. This ensures every piece of your design is adhering to your item. If not, stop peeling, lay it back down, and trouble shoot as follows — (1.) If some or all of the design does not transfer AND it was cool when peeling, it means there was not enough heat, pressure, or time. Press your transfer again with more pressure and time first (+5-10 seconds). (2.) If that doesn’t work, try 15°F heat increments until you find the sweet spot. You truly cannot damage the transfer by pressing multiple times. Final Press & Wash Instructions: Place a parchment paper or a single layer of t-shirt material over the design and press again for 15 seconds to soften the design, increase durability, and remove shine. If you want a shiny finish, cover with a protective guard sheet for the final press. When washing, flip shirt inside out, wash on cold and dry using low heat or hang. *By purchasing you agree that the process for the application of our transfers is your responsibility and we not refund due to user error. There is a learning curve to heat pressing and transfers and every heat press is different.**A heat press is recommended though this will work with a circut or an iron as well***All Sales are Final